Lash Map Guide: A Comprehensive Overview (Updated 04/22/2026)
This guide details creating customized lash extensions, considering eye shape, natural lashes, and client preferences for optimal length, curl, and thickness placement.
What is Lash Mapping?
Lash mapping is the foundational process of planning an eyelash extension application. It involves analyzing a client’s eye shape and natural lash pattern to determine the optimal placement of different lash lengths, curls, and thicknesses. Essentially, it’s creating a blueprint for a perfectly customized lash set.
This isn’t a random process; it’s a strategic approach. It’s looking at the eye’s unique characteristics – whether almond-shaped, round, hooded, upturned, or downturned – and then deciding where each lash extension will be applied to enhance the eye’s natural beauty. A well-executed lash map ensures a balanced, aesthetically pleasing, and comfortable result for the client. Practicing with charts and sponges is crucial for beginners.
Why is Lash Mapping Important?
Lash mapping is paramount for achieving consistently beautiful and safe results in eyelash extensions. Without a map, applications can appear uneven, unnatural, or even damage the natural lashes. Mapping allows technicians to create a custom look tailored to each client’s unique eye shape and desired style.
It ensures a balanced aesthetic, correcting asymmetry and enhancing the eye’s natural features. Furthermore, proper mapping promotes healthy lash growth by distributing the weight of the extensions evenly. Industry expert workshops emphasize its importance. Ignoring this step can lead to client dissatisfaction and potential lash damage, highlighting the need for thorough training and practice with mapping guides.
Understanding Eye Shapes for Mapping
Accurate lash mapping begins with identifying the client’s eye shape. Different shapes require distinct mapping strategies to achieve the most flattering results. Common eye shapes include almond, round, hooded, upturned, and downturned. Looking at the shape of the eye is the first step.
Almond eyes are versatile, while round eyes benefit from lengthening lashes at the outer corners. Hooded eyes require careful mapping to lift and open the eye, avoiding a closed-off appearance. Upturned and downturned eyes need adjustments to balance and enhance their natural tilt. Mastering these distinctions is crucial for creating harmonious and customized lash extensions.

Almond Eye Mapping
Almond eyes are considered the most versatile shape for lash extensions, allowing for a wide range of styles. Mapping for almond eyes focuses on enhancing the natural eye shape without overly dramatic changes. Generally, a balanced approach works well, with slightly longer lashes towards the outer corners to subtly lift and elongate.
Begin with shorter lengths in the inner corner, gradually increasing towards the center, and then extending the longest lengths to the outer third of the eye. This creates a natural, elegant curl. Avoid overly heavy or dense mapping, as almond eyes already possess a beautiful, balanced structure.
Round Eye Mapping
Round eyes benefit from lash mapping that adds length and definition, creating a more elongated appearance. The goal is to visually stretch the eye shape, avoiding a further rounded effect. Mapping should concentrate on adding length to the outer corners, while keeping the inner corner lashes shorter and more sparse.
Employ a “cat-eye” mapping technique, strategically placing longer lengths from the mid-outer eye outwards. This creates a lifting and widening effect. Avoid uniform length across the lash line, as it can accentuate the roundness. Consider using a C or D curl to further enhance the lift and open up the eyes.
Hooded Eye Mapping

Mapping for hooded eyes requires careful consideration of the lid fold, as lashes can appear hidden when the eye is open. The primary aim is to create the illusion of a more open and lifted eye. Focus on mapping longer lengths towards the outer third of the eye, ensuring they are visible even with the lid slightly closed.
Avoid overly long lashes in the inner corner, as they can get lost beneath the hood. A gradual increase in length from inner to outer corner is ideal. Utilize a C or D curl to provide lift and prevent the lashes from appearing flat or downturned. Pre-planning and visualization are crucial for successful hooded eye mapping.
Upturned Eye Mapping
Upturned eyes naturally have a lifted outer corner, making them quite versatile for lash extensions. Mapping should enhance this natural lift, avoiding styles that overly exaggerate the upward angle. A balanced approach is key, focusing on creating a harmonious and flattering look. Begin with shorter lengths in the inner corner, gradually increasing towards the outer eye.
Consider a C or even a B curl for a natural lift, avoiding overly dramatic curls like D or L. Mapping should prioritize maintaining the eye’s open and bright appearance. Volume mapping can be particularly effective, adding fullness without altering the eye’s natural shape. Careful consideration of the natural lash direction is essential.
Downturned Eye Mapping
Downturned eyes have a droopy outer corner, and lash mapping aims to create a lifting effect, making the eyes appear more open and awake. The goal is to counteract the natural downward slope without appearing unnatural or overly dramatic. Mapping should focus on strategically placing longer lengths and more pronounced curls towards the outer corner.
A C, D, or even L curl can be beneficial, depending on the desired level of lift. Avoid applying heavier weights or overly long extensions to the inner corner, as this can accentuate the downturn. Volume mapping can add fullness and further enhance the lifting effect; Careful analysis of the natural lash direction is crucial for a seamless blend.
Lash Curl and Diameter Selection
Choosing the correct curl and diameter is vital for both the aesthetic result and the health of the natural lashes. Curl selection impacts the overall look, ranging from a natural ‘J’ curl to a dramatic ‘L’ curl. Diameter, measured in millimeters, determines the lash’s thickness and weight. A skilled technician considers these factors in relation to the client’s natural lash strength and desired style.
Generally, finer lashes (0.15mm ─ 0.18mm) are suitable for delicate natural lashes, while stronger lashes can support thicker diameters (0.20mm ‒ 0.25mm). Incorrect diameter can cause damage. Proper selection ensures a comfortable, long-lasting, and beautiful lash extension experience.
Curl Selection Guide (J, B, C, D, L)
Understanding lash curl variations is crucial for achieving the desired look. ‘J’ curls offer a very natural, subtle lift, closely mimicking the natural lash. ‘B’ curls provide a slightly more noticeable curl, while ‘C’ curls are a popular choice for a balanced, lifted effect. ‘D’ curls create a dramatic, curled appearance, and ‘L’ curls are the most dramatic, offering a significant lift and curl.
Consider the client’s natural lash curl and eye shape. Straighter lashes benefit from ‘C’ or ‘D’ curls, while already curled lashes may only need a ‘B’ or ‘C’. Always prioritize the health of the natural lash when selecting a curl.
Diameter/Thickness Guide (0.15mm, 0.18mm, 0.20mm, etc.)
Lash diameter, measured in millimeters, impacts the overall look and health of the natural lashes. 0.15mm lashes are the thinnest, ideal for delicate natural lashes or a very natural look; 0.18mm offers a good balance between volume and weight, suitable for most clients. 0.20mm provides more volume and definition, best for those with stronger natural lashes.
Heavier diameters (0.25mm+) should be used cautiously. Always assess the client’s natural lash strength before applying thicker lashes to avoid damage. Consider layering different diameters for a customized, textured effect, ensuring the total weight remains safe for the natural lash.
Mapping for Different Lash Styles
Lash style significantly influences the mapping strategy. Classic lash mapping focuses on 1:1 extensions, emphasizing natural enhancement; map lengths follow the natural lash line, with slightly longer lengths towards the outer corner. Volume lash mapping requires strategic placement for balanced fullness, utilizing multiple finer lashes per natural lash – mapping considers fan creation and weight distribution.
Hybrid lash mapping blends classic and volume techniques. This allows for customized texture and dimension, mapping incorporates both 1:1 and volume fans. Careful planning ensures a seamless transition between techniques, creating a natural yet impactful look.
Classic Lash Mapping
Classic lash mapping prioritizes natural enhancement with a 1:1 ratio – one extension per natural lash. The goal is to mimic the lash’s natural curl and length, creating a subtle, elegant look. Mapping typically begins with the longest lash length at the outer corner, gradually decreasing towards the inner corner for a natural taper.
Consider the natural lash line’s shape. Avoid placing extensions directly onto lashes that are significantly shorter or weaker. Focus on mapping lengths that complement the existing lash structure, ensuring a comfortable and long-lasting result. Consistent spacing and avoiding overcrowding are crucial for a clean, classic set.
Volume Lash Mapping
Volume lash mapping involves applying multiple lightweight extensions (2-6) to each natural lash, creating a fuller, more dramatic look. This technique requires careful planning to distribute the volume evenly and avoid damaging the natural lashes. Mapping often utilizes “spikes” or fans, strategically placed to build density.
Focus on creating a balanced and textured appearance. Vary the fan size and placement throughout the eye, concentrating volume in areas needing more fullness. Mapping should account for the natural lash growth patterns, ensuring the fans follow the natural curl. Proper mapping prevents stickies and maintains a lightweight, comfortable feel for the client.
Hybrid Lash Mapping
Hybrid lash mapping blends the techniques of classic and volume lashes, offering a customizable look that combines natural texture with added fullness. This approach allows for versatility, catering to clients desiring a soft, yet noticeable enhancement. Typically, hybrid sets incorporate both single isolated lashes and lightweight volume fans.
Strategic placement is key; classic lashes are often used along the outer corners for a natural finish, while volume fans are concentrated in the center to create dimension. Mapping should consider the client’s eye shape and desired level of drama. A well-executed hybrid map delivers a textured, fluffy, and balanced result, avoiding a heavy or uniform appearance.
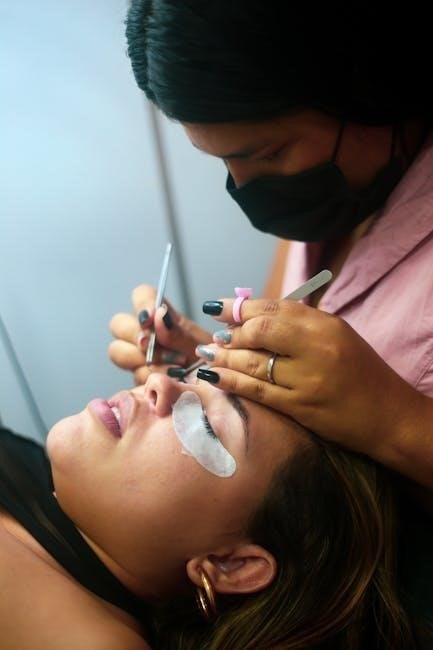
Step-by-Step Lash Mapping Process
The lash mapping process begins with a thorough client consultation and detailed eye analysis. Assess natural lash length, curl, direction, and any allergies or sensitivities. Discuss desired style and fullness with the client, establishing realistic expectations. Next, create a personalized lash map design, visualizing lash placement based on eye shape and aesthetic goals.
Transfer the map to the lash tray, using a mapping pen or marker to indicate lash lengths and curls for each eye section; Utilize practice tools like sponges alongside mapping charts for refinement. Double-check the map for symmetry and accuracy before application, ensuring a balanced and harmonious final look.
Step 1: Client Consultation & Eye Analysis
Begin with a detailed consultation to understand the client’s desired lash style and expectations. Discuss lifestyle, preferences for natural or dramatic looks, and any previous lash extension experiences. Crucially, perform a thorough eye analysis, evaluating the eye shape – almond, round, hooded, upturned, or downturned – to determine the optimal mapping strategy.
Assess the natural lash line, noting length, curl, thickness, and growth direction. Identify any gaps or sparse areas. Check for allergies or sensitivities. This comprehensive analysis forms the foundation for a customized lash map, ensuring a flattering and comfortable result tailored to the individual client’s unique features.

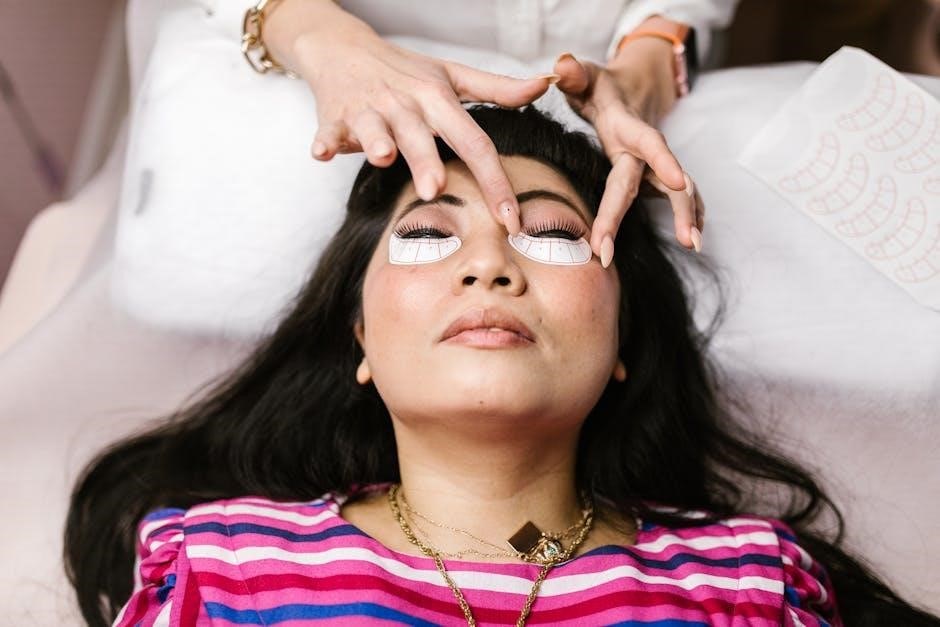
Step 2: Creating the Lash Map Design
Utilize a lash mapping chart as a visual guide during the design process. Based on the eye analysis, sketch a plan indicating varying lash lengths and curls across the eyelid. Generally, shorter lengths are applied to the inner and outer corners, gradually increasing towards the center for an open-eyed effect. Consider the client’s desired style – classic, volume, or hybrid – when determining lash thickness and density.
Customize the map to address individual lash characteristics. For hooded eyes, a map with longer lengths may be needed to ensure visibility. For downturned eyes, a lifted curl can create a more uplifted appearance. Regularly refer to guiding documents and consider attending workshops for enhanced skills.
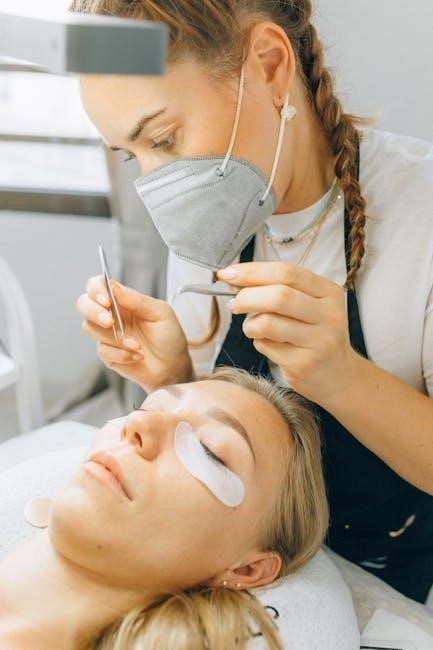
Step 3: Transferring the Map to the Lash Tray
Carefully organize your lash trays according to the created map. Using tweezers, select lashes corresponding to each length and curl designated on the map and place them into separate compartments or sections of the tray. This pre-organization streamlines the application process, saving valuable time during the appointment.
Consider using a lash mapping sponge alongside the chart for practice. This allows for visualizing and refining the design before application. Ensure lashes are neatly arranged and easily accessible, preventing confusion during the procedure. A well-organized tray minimizes errors and promotes a professional, efficient workflow, leading to a flawless final result.
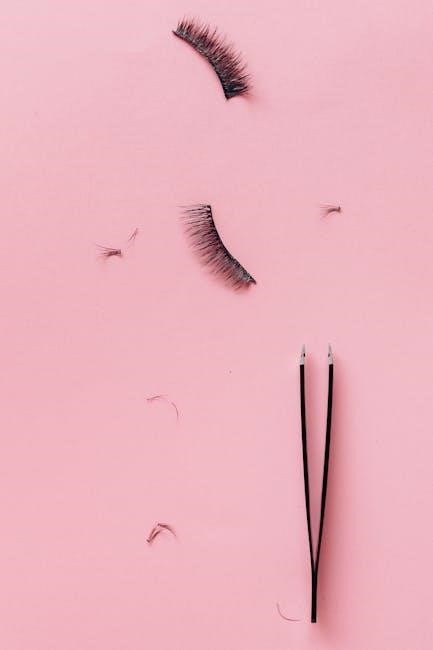
Tools and Materials for Lash Mapping
Essential tools include detailed lash mapping charts and guides, providing visual references for eye shapes and lash placement. Lash mapping sponges, designed to align with charts, offer invaluable practice opportunities for beginners. High-quality lash trays are crucial for organization, allowing for pre-sorted lash lengths and curls.
Laminated charts enhance durability and waterproof qualities, ensuring longevity. Tweezers are vital for precise lash selection and placement. Consider investing in a good lighting source for optimal visibility. Proper organization of materials streamlines the mapping process, contributing to a professional and efficient service. These tools empower technicians to create customized, stunning lash designs.
Lash Mapping Charts & Guides
Lash mapping charts are foundational resources, visually representing ideal lash placement for various eye shapes. These guides break down the mapping process, enabling technicians to create customized sets tailored to individual client needs. Printed on cardstock and laminated for durability, these charts withstand frequent use and maintain a professional appearance.
Guides detail curl and diameter selection, crucial for achieving the desired look. They illustrate how lash length and curl should vary across the eye, from inner to outer corner. Utilizing these resources ensures consistent, high-quality results. Reading guiding documents fosters understanding of mapping principles, leading to more confident and artistic lash applications.
Lash Mapping Sponges/Practice Tools
Practice sponges are invaluable for honing lash mapping skills without the pressure of working on a client. Designed to align perfectly with lash mapping charts, these tools allow technicians to visualize and refine their designs repeatedly. They provide a realistic surface to practice lash placement, ensuring accuracy and efficiency.
Using a sponge alongside a chart enhances learning and builds muscle memory. Technicians can experiment with different lash lengths, curls, and angles, mastering the art of creating balanced and flattering lash sets. These tools are especially beneficial for beginners, accelerating their learning curve and boosting confidence before working with real clients.
Lash Trays & Organization
Efficient lash tray organization is crucial for a streamlined mapping and application process. Pre-sorting lashes by length, curl, and diameter based on your map saves significant time during appointments. Clearly labeled trays prevent confusion and ensure quick access to the desired lashes. Consider using dividers or individual lash palettes within the tray for enhanced organization.

A well-organized system minimizes waste and maintains the integrity of the lashes. Proper storage protects against damage and contamination. Regularly check lash trays for any bent or damaged lashes, discarding them to maintain quality. Investing in a quality lash tray and implementing a consistent organization method will elevate your professionalism and efficiency.
Mapping for Lash Clusters
Cluster mapping focuses on strategic placement for volume and lift. Begin by placing 1-2 wispy clusters close to the natural lash line, maintaining a minimal and natural look. For fullness, layer 3-4 clusters across the center section of the eyelid, building density gradually. Creating a subtle lift is achieved by using 2-3 clusters with a gentle upward angle, opening the eye.
Consider the client’s eye shape when mapping clusters; adjust placement for optimal results. Avoid placing clusters too close to the inner corner to prevent irritation. Proper layering is key to achieving a seamless blend with natural lashes. Remember, less is often more when starting with cluster applications, allowing for adjustments as needed.
Placement of Wispy Clusters

Wispy cluster placement prioritizes a natural, textured look; Begin by strategically positioning individual clusters, mimicking the natural lash pattern. Focus on the outer corners and mid-length lashes for a subtle, fanned-out effect. Avoid dense packing; instead, create spacing between clusters for a softer appearance. Clusters should be applied close to the lash line, ensuring a secure bond without overlapping onto the skin.
Consider varying cluster lengths to enhance the wispy effect. Shorter clusters towards the inner corner and gradually longer ones towards the outer corner create dimension. Proper isolation is crucial to prevent clumping and maintain a clean, defined look. Remember to use a small amount of adhesive for optimal hold and minimal residue.
Layering Clusters for Fullness
Achieving a fuller lash look with clusters involves strategic layering. Begin by applying a base layer of clusters along the lash line, focusing on the mid-section for maximum impact. Subsequently, add a second layer slightly above the first, utilizing slightly longer clusters to create depth and volume. Stagger the placement to avoid a blocky appearance, ensuring a seamless blend between layers.
Gradually increase cluster length towards the outer corners to enhance the eye’s shape. Maintain isolation between clusters to prevent sticking and ensure a lightweight feel. Use a moderate amount of adhesive, avoiding excess that can weigh down the lashes. This technique builds fullness without compromising the natural lash health or creating an unnatural density.
Creating a Subtle Lift with Clusters
A gentle upward lift can be achieved with careful cluster placement. Utilize 2-3 clusters with a slight, angled application, directing the tips upwards towards the outer corner of the eye. Avoid overly dramatic angles, focusing on a natural-looking elevation. This technique opens the eyes and creates a more youthful appearance without appearing overly styled.
Vary cluster lengths, using shorter clusters towards the inner corner and gradually increasing length towards the outer corner to enhance the lift. Ensure proper isolation to prevent clumping and maintain a clean, defined look. This subtle lift is ideal for clients seeking a natural enhancement to their existing lash line, providing a refreshed and awake appearance.
Common Lash Mapping Mistakes to Avoid
Inconsistent mapping leads to unbalanced sets. Avoid neglecting the inner and outer corners, as these areas require specific attention for a harmonious look. Ignoring natural lash direction results in uncomfortable and unnatural extensions. Using excessively long extensions can weigh down the natural lashes, causing damage and discomfort.
Failing to consider eye shape is a frequent error; each shape requires a tailored map. Overlooking client preferences leads to dissatisfaction. Insufficient isolation causes clumping and a messy appearance. Poor organization of lash trays wastes time and increases errors. Always double-check your map before application to ensure a flawless and safe result.
Resources for Further Learning & Training
Elevate your skills with specialized training! Online lash mapping courses offer flexible learning, covering techniques and eye anatomy. Platforms provide detailed tutorials and assessments for comprehensive understanding. Industry expert workshops deliver hands-on practice and personalized feedback, accelerating your proficiency.
Eye Design Store provides guiding documents to understand mapping principles, enabling customized sets. LEES A.M. offers practice charts and sponges for honing skills. Explore resources for advanced techniques and staying current with industry trends. Continuous learning ensures you deliver exceptional, safe, and beautiful lash extensions. Invest in your education for lasting success!
Online Lash Mapping Courses
Numerous platforms offer comprehensive online lash mapping courses, catering to all skill levels. These courses typically cover detailed eye analysis, understanding different eye shapes, and mastering various mapping techniques for classic, volume, and hybrid lashes. Expect interactive modules, video demonstrations, and downloadable resources like practice charts.
Benefits include flexible scheduling, self-paced learning, and often, certification upon completion. Look for courses that emphasize practical application and provide opportunities for feedback on your mapping designs. Many instructors offer ongoing support and access to a community of fellow lash artists. Investing in a quality online course is a convenient and effective way to refine your skills.
Industry Expert Workshops
Attending workshops led by industry experts provides invaluable hands-on experience and personalized guidance in lash mapping. These intensive sessions often focus on advanced techniques, troubleshooting common mapping challenges, and staying current with the latest trends. Workshops offer a unique opportunity to learn directly from seasoned professionals and receive constructive criticism on your work.
Expect live demonstrations, practical exercises using mannequins or live models, and networking opportunities with other lash artists. Look for workshops that cover specific mapping styles or address niche areas like mapping for mature eyes or hooded eyelids. Investing in these workshops accelerates skill development and boosts confidence.