
The Pioneer DMH-W2770NEX is a high-quality RDS AV receiver designed for modern vehicles. It offers a touchscreen display‚ smartphone integration‚ and advanced audio features. This manual guides users through installation‚ setup‚ and troubleshooting‚ ensuring optimal performance and safety. Proper installation is crucial for functionality and longevity of the unit.
1.1 Overview of the Pioneer DMH-W2770NEX
The Pioneer DMH-W2770NEX is a sophisticated RDS AV receiver designed for seamless in-car entertainment. Featuring a high-resolution touchscreen display‚ it supports smartphone integration via Apple CarPlay and Android Auto. The unit also includes a rearview camera input for enhanced safety and a robust audio system for an immersive listening experience. This manual provides detailed guidance for proper installation and setup.
1.2 Importance of the Installation Manual
The installation manual for the Pioneer DMH-W2770NEX is essential for a successful setup. It provides detailed instructions for wiring‚ mounting‚ and configuring the unit‚ ensuring compatibility with your vehicle’s systems. Proper adherence to the manual minimizes the risk of installation errors‚ safeguarding both the device and your car’s electrical systems. It also highlights safety precautions and troubleshooting tips for optimal performance and longevity.

System Requirements and Compatibility
The Pioneer DMH-W2770NEX is compatible with various vehicle makes and models‚ requiring specific software and hardware specifications for optimal performance. Ensure your vehicle’s system meets these requirements to guarantee seamless integration and functionality.
2.1 Compatible Vehicles and Systems
The Pioneer DMH-W2770NEX is designed to fit most modern vehicles with standard dashboard configurations. It is compatible with a wide range of car models‚ including those from major manufacturers like Toyota‚ Honda‚ Ford‚ and Nissan. Ensure your vehicle’s wiring harness and dashboard size align with the unit’s dimensions for a seamless installation. Compatibility also extends to various aftermarket systems‚ making it versatile for different setups.
2.2 Software and Hardware Requirements
The Pioneer DMH-W2770NEX requires a compatible vehicle’s electrical system and dashboard space. It operates on standard automotive voltages and needs a stable power supply. Ensure your vehicle’s wiring harness supports the unit’s features‚ such as touchscreen functionality and Bluetooth connectivity. Additional hardware like an external amplifier or subwoofer may be needed for enhanced audio performance‚ depending on your desired setup.

Pre-Installation Steps
Before installation‚ gather all necessary tools and materials. Prepare the dashboard by disconnecting the battery and removing trim panels. Plan the wiring layout carefully.
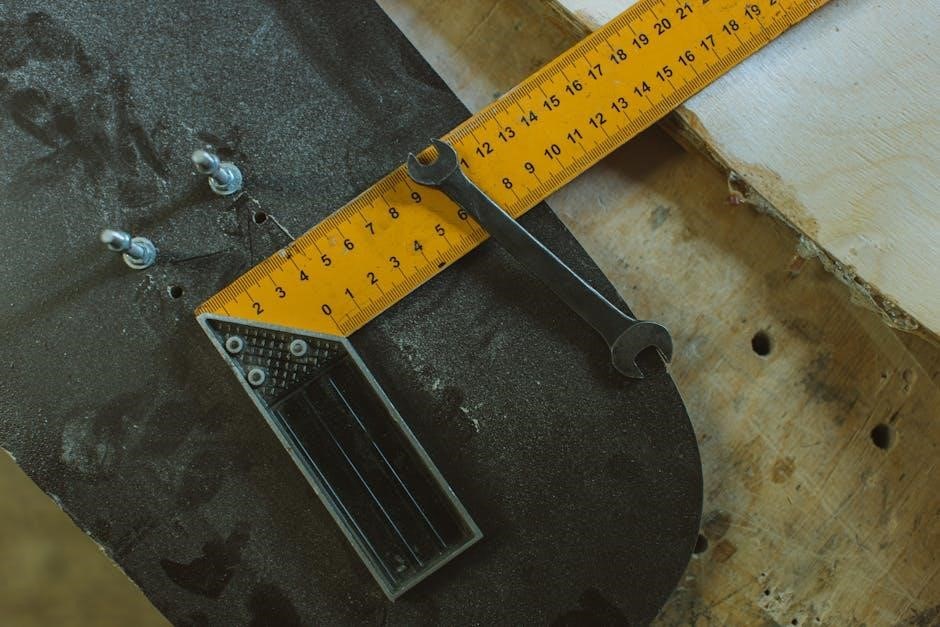
3.1 Gathering Necessary Tools and Materials
To ensure a smooth installation‚ gather essential tools such as screwdrivers‚ pliers‚ and wiring connectors. Materials like adhesive foam tape and RCA cables are also required. Ensure all components from the installation manual are on hand‚ including the wiring harness and dash kit. Proper preparation prevents delays and ensures a professional finish.
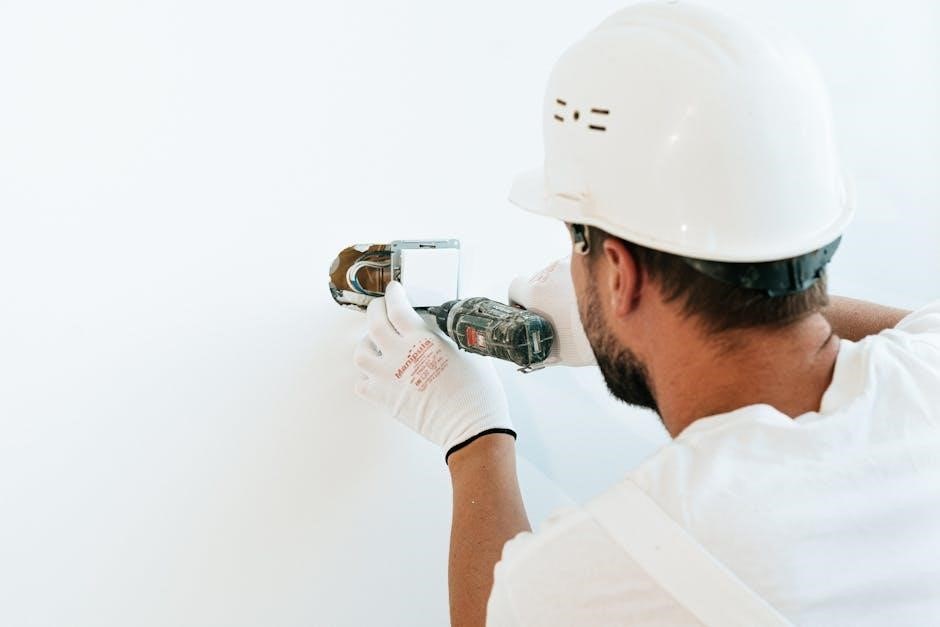
3.2 Preparing the Dashboard and Wiring
Start by disconnecting the car battery to prevent electrical shocks. Remove the dashboard trim and old head unit carefully. Identify and label the wiring harness connections using the manual. Connect the Pioneer’s wiring harness to the vehicle’s wiring‚ ensuring correct matches for power‚ ground‚ and speaker outputs. Secure loose wires and test connections before final installation.

Safety Precautions
Always disconnect the battery before starting installation to avoid electrical shocks. Wear protective gear and ensure proper ventilation. Follow the manual’s guidelines to prevent damage to components or injury.
4.1 General Safety Guidelines
Always disconnect the battery before installation to prevent electrical shocks. Use proper tools and follow the manual to avoid damage. Handle components with care to prevent static discharge. Ensure proper ventilation and avoid overheating. Never operate the unit while driving. Keep flammable materials away and follow local regulations. Regular maintenance is essential for optimal performance and safety.
4.2 Avoiding Common Installation Mistakes
Ensure proper wiring connections to avoid electrical issues. Incorrect mounting can damage the dashboard or unit. Overlooking rearview camera setup may cause safety hazards. Forgetting to update firmware can lead to performance problems. Improper antenna installation may affect signal quality. Always test the system post-installation to identify and fix potential issues before finalizing the setup.

Installation Process
Mount the unit securely in the dashboard‚ connect wiring harnesses‚ and link peripherals like cameras and antennas. Ensure precise alignment and stable connections for optimal performance.
5.1 Mounting the Unit in the Dashboard
Begin by removing the dashboard trim to access the mounting area. Secure the Pioneer DMH-W2770NEX using the provided screws‚ ensuring proper alignment with the dashboard openings. Use the included mounting kit for a precise fit. Gently tighten the screws to avoid damaging the unit or dashboard. Double-check the alignment before finalizing the installation for a seamless appearance and functionality.
5.2 Wiring and Connectivity
Connect the power wire to the vehicle’s ignition circuit and ground wire to a metal chassis. Use the wiring harness to link the Pioneer DMH-W2770NEX to the car’s electrical system. Ensure all connections are secure to prevent electrical interference. Carefully route the speaker wires to the appropriate channels‚ matching the wiring diagram provided. Double-check all connections before powering on the system to ensure proper functionality and avoid damage.
Connecting Peripherals
Connect peripherals like rearview cameras and antennas to enhance functionality. Follow the installation manual for proper setup and ensure all connections are secure for optimal performance.
6.1 Rearview Camera Installation
To install a rearview camera‚ connect it to the dedicated rear camera input on the unit. Ensure proper wiring and configuration as per the installation manual. Connect the camera’s power wire to the vehicle’s reverse light circuit for automatic activation. Test the setup to ensure the camera displays correctly on the screen for safe parking and maneuvering.
6.2 Antenna and Auxiliary Input Setup
Connect the supplied antenna to the Pioneer DMH-W2770NEX for optimal radio reception. For auxiliary inputs‚ attach external devices like smartphones or media players to the designated ports. Ensure all connections are secure to prevent signal loss. Refer to the manual for specific wiring details and configuration steps to achieve the best audio quality and functionality from your connected peripherals.
Post-Installation Setup
Configure settings like display brightness‚ audio equalization‚ and input sources. Test all functions to ensure proper operation. Adjust settings for optimal performance and personalized experience.
7.1 Configuring Settings and Features
After installation‚ access the menu to configure settings like display brightness‚ audio equalization‚ and input sources. Navigate through options to enable features such as Siri Eyes Free or Android Auto. Ensure all connected peripherals are recognized and functioning properly. Customize settings to enhance your user experience and optimize system performance for seamless operation.
7.2 Testing the System
After completing the installation‚ power on the unit and test all functions. Verify the display‚ sound quality‚ and connectivity of peripherals. Ensure Bluetooth and USB connections work seamlessly. Check the rearview camera functionality and touchscreen responsiveness. Test audio output through all speakers to confirm proper wiring. Finally‚ take a short test drive to evaluate system performance in real-world conditions.
Troubleshooting Common Issues
Identify and resolve common issues like connectivity problems or display malfunctions. Check wiring connections‚ reset the unit if necessary‚ and consult the manual for detailed solutions. Contact Pioneer support for further assistance if issues persist.
8.1 Resolving Connectivity Problems
Ensure all connections are secure and properly wired. Restart the unit and check Bluetooth‚ USB‚ or auxiliary inputs for functionality. Verify antenna connections for signal strength. If issues persist‚ consult the manual or contact Pioneer support for assistance. Regularly updating firmware can also resolve connectivity-related problems. Always follow the troubleshooting steps outlined in the installation guide for optimal results.
8.2 Addressing Display or Sound Issues
Check all wiring connections for proper installation and ensure no loose cables. Restart the unit to reset settings. Adjust display brightness and contrast for visibility. For sound issues‚ verify speaker connections and equalizer settings. If problems persist‚ perform a factory reset or consult the manual for advanced troubleshooting steps. Ensure firmware is updated for optimal performance.
Maintenance and Updates
Regularly clean the touchscreen and check for firmware updates. Use Pioneer’s official tools to update software. Consult the manual for detailed maintenance and update procedures.
9.1 Regular Maintenance Tips
Regular maintenance ensures optimal performance. Clean the touchscreen with a soft cloth and avoid harsh chemicals. Check for firmware updates periodically to enhance functionality. Inspect wiring connections to prevent damage. Refer to the manual for specific care instructions. Proper upkeep extends the lifespan and reliability of the Pioneer DMH-W2770NEX system in your vehicle.
9.2 Updating Firmware and Software
Regular firmware and software updates are essential for optimal performance. Visit Pioneer’s official website to download the latest versions. Connect the unit to a computer via USB and follow on-screen instructions. Ensure the vehicle is in a stationary mode during updates. Always verify compatibility before installing new software to avoid system malfunctions. Updates enhance features and fix bugs‚ ensuring smooth operation. Follow the manual for detailed steps.
With proper installation and setup‚ the Pioneer DMH-W2770NEX enhances your driving experience. Regular updates and maintenance ensure longevity and optimal performance. Enjoy seamless connectivity and advanced features for a superior in-car entertainment system. Refer to the manual for any future adjustments or troubleshooting. Your new Pioneer system is now ready to elevate your journeys with crystal-clear sound and intuitive controls. Happy driving!
10.1 Final Checks and Verification
After completing the installation‚ perform a thorough check of all connections and features. Test the touchscreen functionality‚ audio output‚ and rearview camera to ensure proper operation. Verify that all settings are configured correctly and that the system is functioning as expected. Consult the manual or a professional if any issues persist. This final verification ensures a safe and enjoyable experience with your Pioneer DMH-W2770NEX system.
10.2 Enjoying Your New Pioneer DMH-W2770NEX
With your Pioneer DMH-W2770NEX installed‚ explore its advanced features for an enhanced driving experience. Enjoy crystal-clear audio‚ seamless smartphone integration‚ and intuitive touchscreen navigation. Customize settings to your preference and utilize the rearview camera for safety. Take your time to familiarize yourself with all functionalities‚ ensuring a smooth and enjoyable interaction with your new system every time you drive.